
Biochar’s been getting a lot of attention lately, and honestly, it deserves it. It’s basically a type of charcoal you work into your soil, and it comes with a surprising list of benefits — better structure, more water retention, locked-away carbon, and steadier nutrient delivery to your plants over time.
Because it’s so porous, it acts almost like a sponge for moisture, which matters a lot when things get dry.
Whether you’ve been gardening for decades or just started this year, biochar is one of those rare things that’s genuinely good for both your soil and the planet.
So What Exactly Is Biochar?
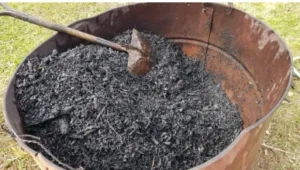
At its core, biochar is charcoal made specifically to go into soil. You get it by heating wood chips, crop waste, or other plant material with little to no oxygen present — a process called pyrolysis. What comes out the other end is a stable, carbon-dense material that can transform how your soil behaves.
A Bit of History
This isn’t some new gardening trend, actually. Amazonian communities were doing this over two thousand years ago — they created what’s now called “Terra Preta,” or black earth, by mixing charcoal with compost and bits of broken pottery. It turned poor, acidic soil into something remarkably fertile, and a lot of today’s biochar methods trace straight back to that discovery.
Why It Works So Well in Soil
There are a few different mechanisms at play here:
- Holds onto nutrients — the porous structure soaks up nutrients like a sponge instead of letting them wash away, so your plants get a steadier supply and you fertilize less often.
- Feeds soil microbes — all those tiny pores make great real estate for beneficial bacteria, which in turn help break down organic matter and keep roots healthy.
- Balances pH — it can neutralize overly acidic soil, which helps in places dealing with acid rain or naturally sour ground.
What You Actually Gain From Using It
Biochar makes nutrients more available to plants simply by holding them in place near the roots instead of letting them leach away. It also loosens up soil structure — better aeration, better water-holding capacity, and less risk of compaction. The end result is healthier root growth and generally happier plants.
And the Environmental Side of Things
Carbon capture is arguably the biggest win here. When biomass turns into biochar instead of just decomposing or burning normally, that carbon gets locked in rather than released as CO2 — a real, long-term contribution to fighting climate change.
It can also cut down on methane and nitrous oxide coming off your soil, simply by making everything more stable and nutrient-efficient.
And because it holds water so well, plants growing in biochar-amended soil tend to handle drought and sandy, fast-draining conditions much better — which also means less frequent watering for you.
What You’ll Need to Make It
Raw material:
- Wood chips (great option — carbon-rich and easy to find)
- Agricultural waste like husks or crop leftovers
- Yard trimmings — small branches, leaves, that sort of thing
Burning setup:
- A 55-gallon metal drum works fine for small batches (just make sure it’s clean, no residue)
- A dedicated biochar kiln if you’re doing larger volumes
- Something to light it — matches or a lighter, plus a reliable ignition method
- Water nearby — hose, bucket, whatever — to quench the fire once pyrolysis is done
Handling tools:
- A shovel for moving material around
- Tongs, essential for handling hot biochar without burning yourself
Safety gear (not mandatory, but honestly worth it):
- Gloves
- Safety goggles
- A mask to avoid breathing in smoke and fine particulates
Step-by-Step: Making Your Own Biochar
1. Collect your biomass — wood chips, crop residue, yard debris. Make sure it’s dry before you start; wet material burns inefficiently. Source it locally if you can, and stay away from treated wood or anything chemically treated.
2. Set up your drum or kiln — a 55-gallon drum is the standard for home use. Clean it out completely, then drill a few holes near the bottom for airflow. Place it on a surface that won’t catch fire.
3. Load it up — pack the biomass in loosely, leaving some room at the top so air can move through.
4. Gear up for safety — goggles, gloves, and keep water within reach the entire time.
5. Light it — start with a small amount of kindling at the top and build from there, feeding in more biomass gradually as it catches.
6. Watch the burn — this part takes attention. Adjust the biomass as needed to keep things burning steadily without flaring out of control.
7. Understand what’s happening — pyrolysis needs high heat but very limited oxygen. The goal isn’t to burn everything to ash — it’s to break the material down without full combustion. Too much airflow and you’ll just end up with regular ash instead of biochar.
8. Quench it — after a few hours, once it’s converted, douse it evenly with water to stop the process and cool it down.
9. Handle it carefully — use tongs or a shovel, keep your gloves and goggles on.
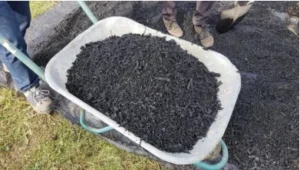
10. Process the final product — once cooled, break it into smaller pieces with a hammer or shovel, then store it somewhere dry — a sealed bag or container works well so it doesn’t soak up moisture before you’re ready to use it.
Getting Biochar Ready for Your Soil
Don’t just toss raw biochar straight into your garden — mix it with soil or compost first, and stick to reasonable ratios:
- Vegetable beds: 5–10% by volume
- Flower beds: 5–10% by volume
- Lawns: a thin layer, about 0.5–1 inch, raked into the topsoil
“Charging” the Biochar
Raw biochar on its own can actually pull nutrients away from soil temporarily, so it helps to mix it with compost first — roughly 1:1 — and let it sit for a couple of weeks so it absorbs nutrients and beneficial microbes before going into the ground. Once charged, work it into the top 6–12 inches of soil.
Adjusting for Your Soil Type
- Sandy soil: benefits a lot from biochar’s water and nutrient retention — lean toward the higher end of that 10% range.
- Clay soil: biochar helps loosen things up and improve drainage — mix thoroughly to avoid clumps.
- Acidic soil: biochar can help raise pH — test your soil first, then adjust the amount accordingly.
- Heavy feeders like tomatoes and corn respond especially well, since biochar keeps nutrients available longer — consider pre-loading it with extra nutrients.
- Trees and perennials: apply around the drip line and mix into the topsoil for long-term benefit.
Common Problems and How to Fix Them
Incomplete pyrolysis — if your biomass doesn’t fully convert, you’ll end up with ash or half-burned chunks. Fix: make sure everything’s dry before you start, keep monitoring the burn, and give it enough time to fully convert.
Too much smoke — usually means poor airflow or an uneven burn. Fix: add more ventilation holes, use smaller pieces of biomass, and don’t overload the drum — packing it too tight chokes off airflow and leads to incomplete burning.
Final Thoughts
Biochar checks a lot of boxes at once — better water management, lower emissions, richer soil, and stronger nutrient retention. It’s genuinely one of the more effective things you can do for both your garden and the climate.
The process itself isn’t complicated: gather your biomass, set up your burn container, keep an eye on the fire, then work the finished product into your soil. It’s a satisfying weekend project that can noticeably boost how your garden performs over time.
If you haven’t tried it yet, it’s worth a shot — a small, practical step toward more sustainable gardening.